Instruction Manual
Mode D'emploi
Bedienungsanleitung
Manuale Utente
Manual De Usuario
Manual De Utilizador
Kullanım Kılavuzu
Upute Za Upotrebu
Руководство Пользователя
فصولا ءازجأ
/
/
DE Bedienungsanleitung
IT Manuale Utente
EN Instruction Manual FR Mode D’emploi
SAFETY
IMPORTANT INSTRUCTIONS ON SAFETY OF USE PLEASE READ CAREFULLY AND
KEEP FOR FUTURE REFERENCE!
• By ignoring the safety instructions the manufacturer can not be hold
responsible for the damage.
• If the supply cord is damaged, it must be replaced by the manufacturer, its
service agent or similarly qualied persons in order to avoid a hazard.
• Never move the appliance by pulling the cord and make sure the cord can
not become entangled.
• The appliance must be placed on a stable, level surface.
• The user must not leave the device unattended while it is connected to the
supply.
• This appliance is only to be used for household purposes and only for the
purpose it is made for.
• To protect yourself against an electric shock, do not immerse the cord, plug or
appliance in the water or any other liquid.
• The appliance should only be connected to an earthed socket. Make sure
the voltage indicated on the appliance corresponds to the local mains voltage
before plugging in.
CHILD SAFETY: This appliance should not be used by children under 8 years of
age. This appliance can only be used by children aged from 8 years and above
and persons with reduced physical, sensory or mental capabilities or lack of
experience and knowledge if they are supervised or understand the hazards
and instructions concerning use of the appliance in a safe way. Children should
not play with the device. Keep the device and cord out of the reach of children
under 8 years old. Cleaning and maintenance should not be done by children
unless they are over 8 years old and under supervision.
DEVICE SAFETY:
Make sure it is mounted correctly. Otherwise, the device will be out of
warranty. Do not use the device under the sun. Use on unshakable and stable
ground. Do not bring your face or hair close to the propellers while the device
is operating.
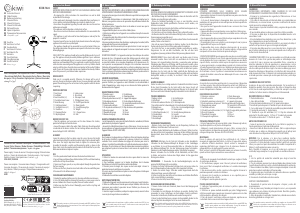
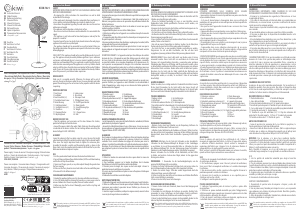
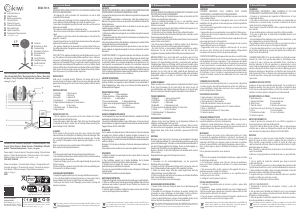
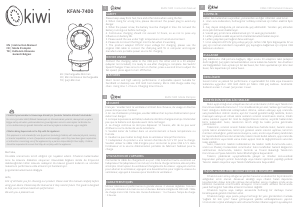
PARTS DESCRIPTION
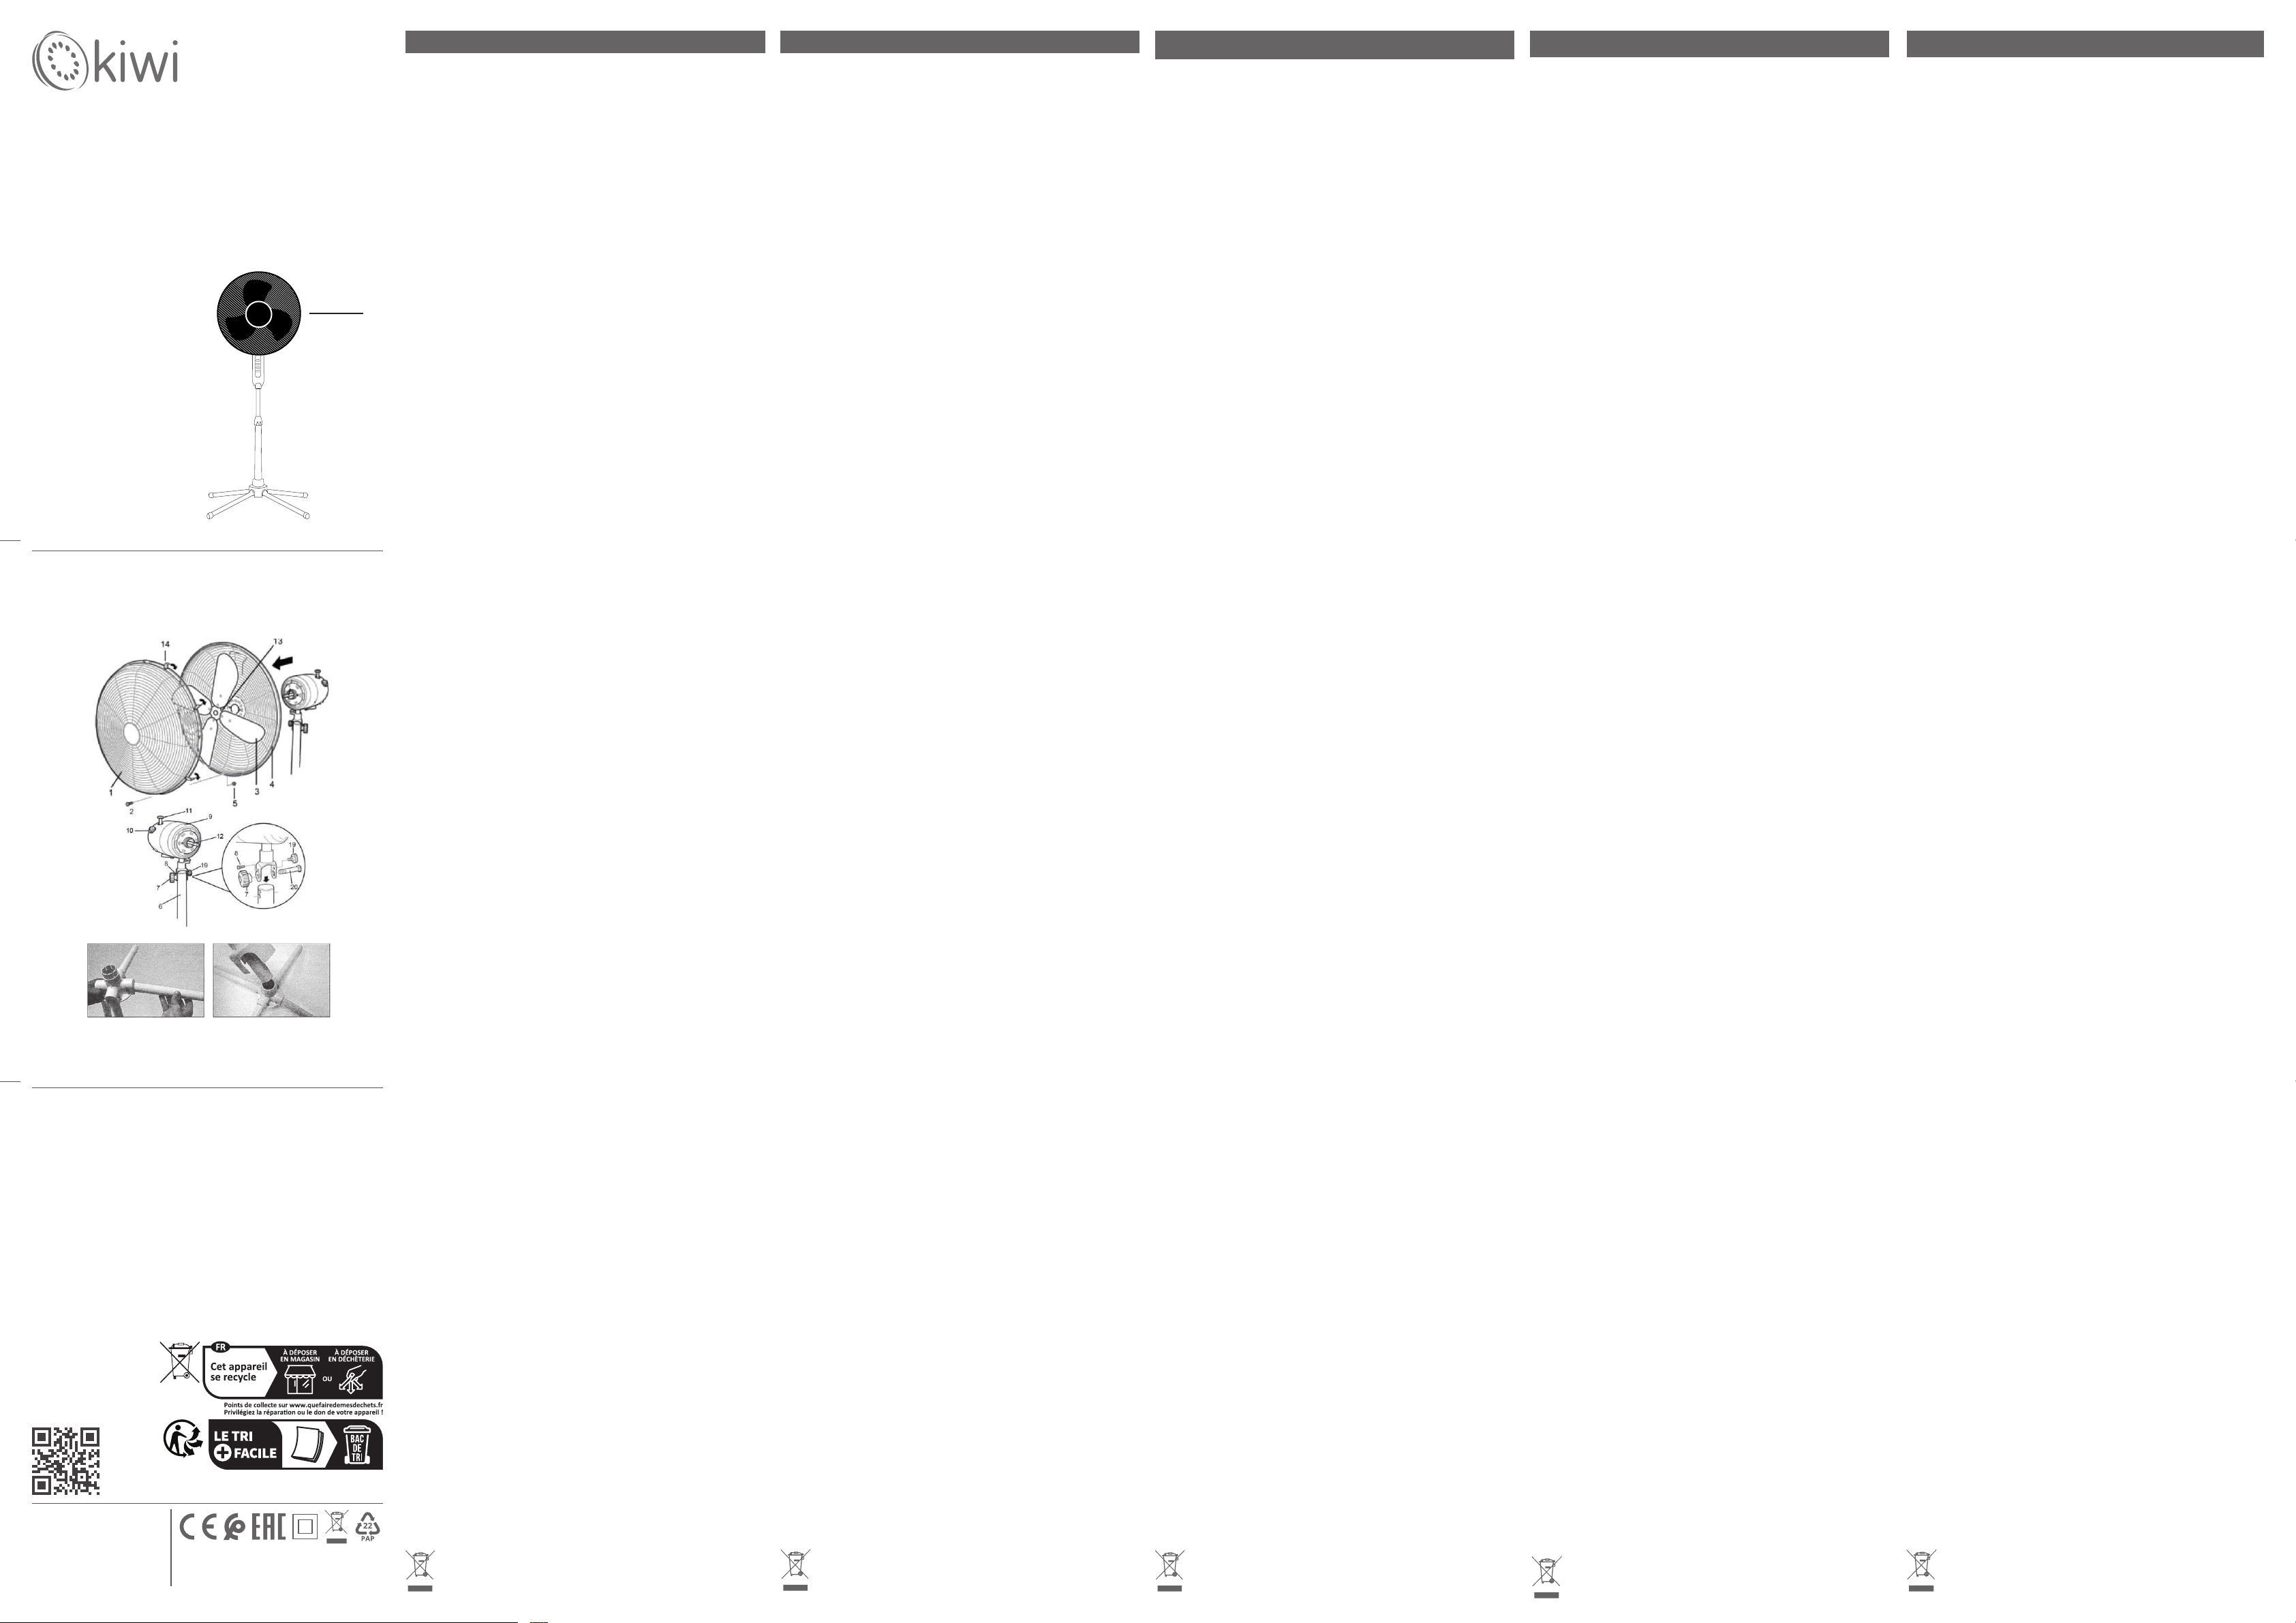
1. Front Guard 2. Locking screw
3. Fan Blades 4. Rear Guard
5. Front Guard Nut (x1) 6 . Telescopic Stand
7. Pivot Adjustment Screw 8. Tilt Adjustment Screw
9. Motor Housing 10. On/O/Speed Control
11. Oscillating Control 12. Motor Spindle
13. Fan Blade Screw (x1) 14. Guard Retaining Clips
15. Stand Base 16. Weight
17. Clamping Washer 18. L Shaped Screw
19. Adjusting knob 20. Bolt
BEFORE THE FIRST USE
• Take the appliance and accessories out the box. Remove the stickers,
protective foil or plastic from the device.
• Connect the power cable to the socket. (Note: Make sure the voltage which
is indicated on the device matches the local voltage before connecting the
device. Voltage AC220V-240V 50Hz).
ASSEMBLY
Secure the column to the base plate using the screw. Unscrew the height
adjustment knob. Attach the column head and adjust it to the desired height.
Then screw the height adjustment knob to tighten the extension pole.
Assemble the impeller assembly and the protective grille as shown in the
gure. Note: Screw the impeller onto the motor shaft to hold the fan, turn the
blade counterclockwise to place it in place.
USE
1. Use the speed control knobs to choose the desired ventilation level.
2. For oscillation push down the oscillation button, Pull the oscillation knob up
and the fan will stop the oscillation.
3. Never insert ngers, pencils, or any other object through the guard when
the fan is running.
4. Make sure the fan is placed on a level and stable surface to avoid falling over.
5. Disconnect the fan before moving it.
CLEANING AND MAINTENANCE
1. Unplug the appliance before you start cleaning and before maintenance.
2. Use a soft damp cloth for cleaning the housing, use some soapy water to
remove stubborn dust. Do not use petrol, thinners or other solvents.
3. Before you store the fan clean it thoroughly, cover it with a vinyl bag and
store it on a dry place.
SICUREZZA
ISTRUZIONI IMPORTANTI SULLA SICUREZZA D’USO LEGGERE
ATTENTAMENTE E CONSERVARE PER FUTURE RIFERIMENTI!
• Ignorando le istruzioni di sicurezza il produttore non può essere ritenuto
responsabile del danno.
• Se il cavo di alimentazione è danneggiato, deve essere sostituito dal
produttore, dal suo agente di servizio o da persone similmente qualicate
per evitare pericoli.
• Non spostare mai l’apparecchio tirando il cavo e assicurarsi che il cavo
non possa impigliarsi.
• L’apparecchio deve essere posizionato su una supercie stabile e piana.
• L’utente non deve lasciare il dispositivo incustodito mentre è collegato
all’alimentazione.
• Questo apparecchio deve essere utilizzato solo per scopi domestici e solo
per lo scopo per il quale è stato realizzato.
• Per proteggersi da una scossa elettrica, non immergere il cavo, la spina o
l’apparecchio nell’acqua o in altri liquidi.
• L’apparecchio deve essere collegato esclusivamente ad una presa
con messa a terra. Assicurarsi che la tensione indicata sull’apparecchio
corrisponda alla tensione di rete locale prima di collegarla.
SICUREZZA DEI BAMBINI: questo apparecchio non deve essere utilizzato da
bambini di età inferiore a 8 anni. Questo apparecchio può essere utilizzato
solo da bambini di età pari o superiore a 8 anni e da persone con ridotte
capacità siche, sensoriali o mentali o prive di esperienza e conoscenza
se sono supervisionati o se comprendono i pericoli e le istruzioni relative
all’uso dell’apparecchio in modo sicuro. I bambini non devono giocare con
il dispositivo. Tenere il dispositivo e il cavo fuori dalla portata dei bambini
di età inferiore a 8 anni. La pulizia e la manutenzione non devono essere
eseguite da bambini a meno che non abbiano più di 8 anni e siano sotto
supervisione.
SICUREZZA DEL DISPOSITIVO:
Assicurati che sia montato correttamente. In caso contrario, il dispositivo
sarà fuori garanzia. Non utilizzare il dispositivo sotto il sole. Utilizzare su
terreno incrollabile e stabile. Non avvicinare il viso o i capelli alle eliche
mentre il dispositivo è in funzione.
DESCRIZIONE DELLE PARTI
1. Protezione anteriore 2. Vite di bloccaggio
3. Pale della ventola 4. Protezione posteriore
5. Dado della protezione anteriore (x1) 6. Supporto telescopico
7. Vite di regolazione del perno 8. Vite di regolazione dell’inclinazione
9. Alloggiamento motore 10. Controllo On/O/velocità
11. Controllo oscillante 12. Mandrino motore
13. Vite della pala della ventola (x1) 14. Clip di ssaggio della protezione
15. Base del supporto 16. Peso
17. Rondella di serraggio 18. Vite a L
19. Manopola di regolazione 20. Bullone
PRIMA DEL PRIMO UTILIZZO
• Estrarre l’apparecchio e gli accessori dalla scatola. Rimuovere gli adesivi,
la pellicola protettiva o la plastica dal dispositivo.
• Collegare il cavo di alimentazione alla presa. (Nota: assicurarsi che la
tensione indicata sul dispositivo corrisponda alla tensione locale prima di
collegare il dispositivo. Tensione AC220V-240V 50Hz).
MONTAGGIO
Fissare la colonna alla piastra di base utilizzando le viti. Svitare la
manopola di regolazione dell’altezza. Installare il tappo della colonna
e sollevarlo all’altezza desiderata. Quindi avvitare la manopola di
regolazione dell’altezza per stringere l’asta di estensione. Montare il
gruppo dell’elica e la griglia protettiva come mostrato.
Nota: avvitare la girante sull’albero del motore per sostenere la ventola,
quindi sostituire la pala ruotandola in senso antiorario.
USO
1. Utilizzare le manopole di controllo della velocità per scegliere il livello
di ventilazione desiderato.
2. Per l’oscillazione, spingere verso il basso il pulsante di oscillazione,
tirare verso l’alto la manopola di oscillazione e la ventola interromperà
l’oscillazione.
3. Non inserire mai dita, matite o qualsiasi altro oggetto attraverso la
protezione quando la ventola è in funzione.
4. Assicurarsi che la ventola sia posizionata su una supercie piana e
stabile per evitare che si ribalti.
5. Scollegare la ventola prima di spostarla.
PULIZIA E MANUTENZIONE
1. Scollegare l’apparecchio prima di iniziare la pulizia e prima della
manutenzione.
2. Utilizzare un panno morbido inumidito per pulire l’alloggiamento,
utilizzare un po’ di acqua saponata per rimuovere la polvere ostinata. Non
utilizzare benzina, diluenti o altri solventi.
3. Prima di riporre il ventilatore, pulirlo accuratamente, coprirlo con un
sacchetto di vinile e conservarlo in un luogo asciutto.
SÉCURITÉ
INSTRUCTIONS IMPORTANTES SUR LA SÉCURITÉ D’UTILISATION VEUILLEZ LIRE
ATTENTIVEMENT ET CONSERVER POUR RÉFÉRENCE FUTURE !
• En ignorant les consignes de sécurité, le fabricant ne peut être tenu responsable
des dommages.
• Si le cordon d’alimentation est endommagé, il doit être remplacé par le
fabricant, son agent de service ou des personnes de qualification similaire afin
d’éviter tout danger.
• Ne déplacez jamais l’appareil en tirant sur le cordon et assurez-vous que le
cordon ne peut pas s’emmêler.
• L’appareil doit être placé sur une surface stable et plane.
• L’utilisateur ne doit pas laisser l’appareil sans surveillance lorsqu’il est connecté
à l’alimentation.
• Cet appareil ne doit être utilisé qu’à des fins domestiques et uniquement aux
fins pour lesquelles il a été conçu.
• Pour vous protéger contre un choc électrique, ne plongez pas le cordon, la fiche
ou l’appareil dans l’eau ou tout autre liquide.
• L’appareil ne doit être connecté qu’à une prise de terre. Assurez-vous que la
tension indiquée sur l’appareil correspond à la tension secteur locale avant de
le brancher.
SÉCURITÉ DES ENFANTS : Cet appareil ne doit pas être utilisé par des enfants
de moins de 8 ans. Cet appareil ne peut être utilisé que par des enfants âgés
de 8 ans et plus et des personnes ayant des capacités physiques, sensorielles
ou mentales réduites ou un manque d’expérience et de connaissances s’ils
sont supervisés ou comprennent les dangers et les instructions concernant
l’utilisation de l’appareil de manière sûre. Les enfants ne doivent pas jouer avec
l’appareil. Gardez l’appareil et le cordon hors de portée des enfants de moins de
8 ans. Le nettoyage et l’entretien ne doivent pas être effectués par des enfants à
moins qu’ils n’aient plus de 8 ans et sous surveillance.
SÉCURITÉ DE L’APPAREIL:
Assurez-vous qu’il est monté correctement. Sinon, l’appareil ne sera plus sous
garantie. N’utilisez pas l’appareil au soleil. Utilisation sur sol inébranlable et
stable. N’approchez pas votre visage ou vos cheveux des hélices pendant le
fonctionnement de l’appareil.
DESCRIPTION DES PIÈCES
1. Protection avant 2. Vis de blocage
3. Pales de ventilateur 4. Protection arrière
5. Écrou de protection avant (x1) 6. Support télescopique
7. Vis de réglage du pivot 8. Vis de réglage de l’inclinaison
9. Boîtier du moteur 10. Commande marche/arrêt/vitesse
11. Commande oscillante 12. Axe du moteur
13. Vis de pale de ventilateur (x1) 14. Clips de retenue de la protection
15. Base du support 16. Poids
17. Rondelle de serrage 18. Vis en L
19. Bouton de réglage 20. Boulon
AVANT LA PREMIÈRE UTILISATION
• Sortez l’appareil et les accessoires de la boîte. Retirez les autocollants, le film de
protection ou le plastique de l’appareil.
• Connectez le câble d’alimentation à la prise. (Remarque : Assurez-vous que la
tension indiquée sur l’appareil correspond à la tension locale avant de connecter
l’appareil. Tension AC220V-240V 50Hz).
ASSEMBLÉE
Fixez la colonne à la plaque de base à l’aide de vis. Dévissez le bouton de réglage
de la hauteur. Installez le capuchon de la colonne et élevez-le à la hauteur
souhaitée. Vissez ensuite le bouton de réglage de la hauteur pour serrer la
rallonge. Assemblez l’ensemble hélice et la grille de protection comme illustré.
Remarque: Vissez la turbine sur l’arbre du moteur pour maintenir le ventilateur,
puis remplacez la pale en la tournant dans le sens inverse des aiguilles d’une
montre.
UTILISATION
1. Utilisez les boutons de commande de vitesse pour choisir le niveau de
ventilation souhaité.
2. Pour l’oscillation, appuyez sur le bouton d’oscillation, tirez le bouton
d’oscillation vers le haut et le ventilateur arrêtera l’oscillation.
3. N’insérez jamais les doigts, des crayons ou tout autre objet à travers la
protection lorsque le ventilateur est en marche.
4. Assurez-vous que le ventilateur est placé sur une surface plane et stable pour
éviter de tomber.
5. Débranchez le ventilateur avant de le déplacer.
NETTOYAGE ET ENTRETIEN
1. Débranchez l’appareil avant de commencer le nettoyage et avant l’entretien.
2. Utilisez un chiffon doux et humide pour nettoyer le boîtier, utilisez de l’eau
savonneuse pour enlever la poussière tenace. N’utilisez pas d’essence, de
diluants ou d’autres solvants.
3. Avant de ranger le ventilateur, nettoyez-le soigneusement, couvrez-le d’un
sac en vinyle et rangez-le dans un endroit sec.
SICHERHEIT
WICHTIGE HINWEISE ZUR GEBRAUCHSSICHERHEIT BITTE SORGFÄLTIG LESEN
UND ZUM NACHSCHLAGEN AUFBEWAHREN!
• Bei Nichtbeachtung der Sicherheitshinweise kann der Hersteller nicht für
Schäden verantwortlich gemacht werden.
• Wenn das Netzkabel beschädigt ist, muss es vom Hersteller, seinem
Kundendienst oder ähnlich qualizierten Personen ersetzt werden, um
Gefahren zu vermeiden.
• Bewegen Sie das Gerät niemals durch Ziehen am Kabel und vergewissern Sie
sich, dass sich das Kabel nicht verfangen kann.
• Das Gerät muss auf einer stabilen, ebenen Fläche aufgestellt werden.
• Der Benutzer darf das Gerät nicht unbeaufsichtigt lassen, während es an die
Stromversorgung angeschlossen ist.
• Dieses Gerät darf nur für Haushaltszwecke und nur für den Zweck verwendet
werden, für den es bestimmt ist.
• Um sich vor einem Stromschlag zu schützen, tauchen Sie das Kabel, den
Stecker oder das Gerät nicht in Wasser oder andere Flüssigkeiten.
• Das Gerät darf nur an eine geerdete Steckdose angeschlossen werden.
Vergewissern Sie sich vor dem Anschließen, dass die auf dem Gerät
angegebene Spannung mit der örtlichen Netzspannung übereinstimmt.
KINDERSICHERHEIT: Dieses Gerät sollte nicht von Kindern unter 8 Jahren
verwendet werden. Dieses Gerät darf nur von Kindern ab 8 Jahren und
Personen mit eingeschränkten physischen, sensorischen oder geistigen
Fähigkeiten oder Mangel an Erfahrung und Wissen benutzt werden, wenn
sie beaufsichtigt werden oder die Gefahren und Anweisungen zum sicheren
Gebrauch des Geräts verstehen. Kinder sollten nicht mit dem Gerät spielen.
Bewahren Sie das Gerät und das Kabel außerhalb der Reichweite von
Kindern unter 8 Jahren auf. Reinigung und Wartung sollten nicht von Kindern
durchgeführt werden, es sei denn, sie sind über 8 Jahre alt und werden
beaufsichtigt.
GERÄTESICHERHEIT:
Stellen Sie sicher, dass es richtig montiert ist. Andernfalls erlischt die Garantie
für das Gerät. Verwenden Sie das Gerät nicht in der Sonne. Einsatz auf
unerschütterlichem und stabilem Untergrund. Bringen Sie Ihr Gesicht oder
Ihre Haare nicht in die Nähe der Propeller, während das Gerät in Betrieb ist.
TEILEBESCHREIBUNG
1. Vorderer Schutz 2. Feststellschraube
3. Lüfterügel 4. Hinterer Schutz
5. Mutter des vorderen Schutzes (x1) 6. Teleskopständer
7. Einstellschraube für Schwenkbereich 8. Einstellschraube für Neigung
9. Motorgehäuse 10. Ein-/Aus-/Geschwindigkeitsregler
11. Oszillationsregler 12. Motorspindel
13. Lüfterügelschraube (x1) 14. Schutzhalterungsklammern
15. Ständersockel 16. Gewicht
17. Klemmscheibe 18. L-förmige Schraube
19. Einstellknopf 20. Bolzen
VOR DEM ERSTEN GEBRAUCH
• Nehmen Sie das Gerät und Zubehör aus der Verpackung. Entfernen Sie
Aufkleber, Schutzfolie oder Plastik vom Gerät.
• Schließen Sie das Netzkabel an die Steckdose an. (Hinweis: Stellen Sie sicher,
dass die auf dem Gerät angegebene Spannung mit der örtlichen Spannung
übereinstimmt, bevor Sie das Gerät anschließen. Spannung AC220V-240V
50Hz).
MONTAGE: Befestigen Sie die Säule mit Schrauben an der Grundplatte.
Schrauben Sie den Höhenverstellknopf ab. Bringen Sie die Säulenkappe
an und heben Sie sie auf die gewünschte Höhe an. Schrauben Sie dann
den Höhenverstellknopf fest, um die Verlängerungsstange festzuziehen.
Montieren Sie die Propellerbaugruppe und das Schutzgitter wie gezeigt.
Hinweis: Schrauben Sie das Laufrad auf die Motorwelle, um den Lüfter
zu halten, und ersetzen Sie dann den Flügel, indem Sie ihn gegen den
Uhrzeigersinn drehen.
VERWENDEN: 1. Verwenden Sie die Geschwindigkeitsregler, um die
gewünschte Belüftungsstufe auszuwählen.
2. Drücken Sie für die Oszillation die Oszillationstaste nach unten, ziehen Sie
den Oszillationsknopf nach oben und der Lüfter stoppt die Oszillation.
3. Stecken Sie niemals Finger, Stifte oder andere Gegenstände durch die
Schutzvorrichtung, wenn der Lüfter läuft.
4. Stellen Sie sicher, dass der Lüfter auf einer ebenen und stabilen Oberäche
steht, um ein Umfallen zu vermeiden.
5. Trennen Sie den Lüfter, bevor Sie ihn bewegen.
REINIGUNG UND INSTANDHALTUNG
1. Trennen Sie das Gerät vom Stromnetz, bevor Sie mit der Reinigung und
Wartung beginnen.
2. Verwenden Sie zum Reinigen des Gehäuses ein weiches, feuchtes Tuch,
verwenden Sie etwas Seifenlauge, um hartnäckigen Staub zu entfernen.
Verwenden Sie kein Benzin, Verdünner oder andere Lösungsmittel.
3. Bevor Sie den Ventilator lagern, reinigen Sie ihn gründlich, decken Sie ihn
mit einer Vinyltüte ab und lagern Sie ihn an einem trockenen Ort.
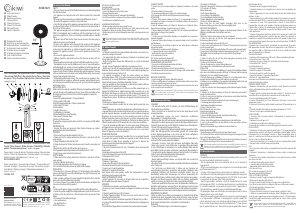
Parts Description / Description Des Pièces / Teilebeschreibung
/ Descrizione Delle Parti / Descripción De Las Piezas / Descrição
das peças / Parça Tanımları/ Opis dijelova / Детали Описание /
Technical Data / Données Techniques / Technische Daten / Dati
Tecnici / Datos Técnicos / Dados Técnicos / Teknik Bilgi / Tehnički
podaci / Технические данные
Power supply / Source de courant / Energieversorgung / Alimentazione
elettrica / Fuente de alimentación / Fonte de energia / Güç kaynağı /
Opskrba strujom / Электропитание
220-240V, 50/60Hz
Power consumption / Consommation d’énergie / Energieverbrauch /
Consumo di energia / El consumo de energía / Consumo de energia /
Güç tüketimi / Potrošnja energije / Потребляемая мощность /
45W
KFAN-7426
EN
FR
DE
IT
ES
PT
TR
HR
RU
AR
EN
FR
DE
IT
ES
PT
TR
HR
RU
AR
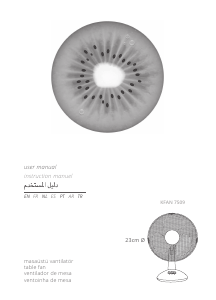
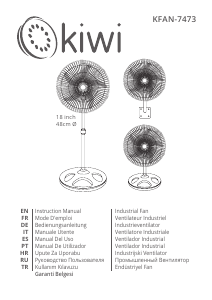
16"
41cm
Stand Fan
Ventilateur Sur Pied
Standventilator
Ventilatore A Piantana
Ventilador De Pie
Ventoinha
Stajati Ventilator
Стенд Вентилятор
Standlı Vantilatör
This product contains recyclable materials that comply with WEEE guidelines. Do not
dispose of this product as unsorted waste. Please contact your local municipality for a
recycling collection point.
Ce produit contient des matériaux recyclables conformes aux directives DEEE. Ne jetez
pas ce produit comme déchet non trié. Veuillez contacter votre municipalité locale
pour un point de collecte de recyclage.
Dieses Produkt enthält recycelbare Materialien, die den WEEE-Richtlinien entsprechen.
Entsorgen Sie dieses Produkt nicht als unsortierten Abfall. Bitte wenden Sie sich an
Ihre örtliche Gemeinde, um eine Recycling-Sammelstelle zu erhalten.
kiwi-home.com
Made in China / Menşei: Çin / Hergestellt in China / Fabriqué
en Chine / Prodotto in Cina / Fabricado en China/ / Сделано
в Китае / Proizvedeno u Kini /
Üretim Tarihi/Production Date: 11-2024/K3831
Manufacturer-Importer/
İmalatçı-İthalatçı
BMVA Elektronik San. ve Tic. A.Ş.
Osmangazi Mh, 2644. Sk. No:3/2
Kıraç-Esenyurt / Istanbul – TURKEY
Questo prodotto contiene materiali riciclabili conformi alle linee guida WEEE. Non
smaltire questo prodotto come riuto indierenziato. Si prega di contattare il
proprio comune locale per un punto di raccolta del riciclaggio.
ES Manual De Usuario
SEGURIDAD
INSTRUCCIONES IMPORTANTES SOBRE SEGURIDAD DE USO LEER
DETENIDAMENTE Y GUARDAR PARA FUTURAS CONSULTAS.
• Al ignorar las instrucciones de seguridad, el fabricante no se hace
responsable del daño.
• Si el cable de alimentación está dañado, debe ser reemplazado por
el fabricante, un servicio técnico o personas cualicadas de manera
similar para evitar cualquier peligro.
• Nunca mueva el aparato tirando del cable y asegúrese de que el cable
no se enrede.
• El aparato debe colocarse sobre una supercie estable y nivelada.
• El usuario no debe dejar el dispositivo desatendido mientras esté
conectado a la red.
• Este electrodoméstico solo debe usarse para nes domésticos y solo
para el propósito para el que fue fabricado.
• Para protegerse contra una descarga eléctrica, no sumerja el cable, el
enchufe o el aparato en el agua ni en ningún otro líquido.
• El aparato solo debe conectarse a una toma de tierra. Asegúrese de
que el voltaje indicado en el aparato corresponda con el voltaje de la
red local antes de enchufarlo.
SEGURIDAD PARA NIÑOS: Este aparato no debe ser utilizado por niños
menores de 8 años. Este aparato solo puede ser utilizado por niños
a partir de 8 años y personas con capacidades físicas, sensoriales o
mentales reducidas o falta de experiencia y conocimiento si están
supervisados o comprenden los peligros y las instrucciones relacionadas
con el uso del aparato de forma segura. Los niños no deben jugar con el
dispositivo. Mantenga el dispositivo y el cable fuera del alcance de los
niños menores de 8 años. La limpieza y el mantenimiento no deben ser
realizados por niños a menos que sean mayores de 8 años y estén bajo
supervisión.
SEGURIDAD DEL DISPOSITIVO:
Asegúrese de que esté montado correctamente. De lo contrario, el
dispositivo quedará fuera de garantía. No utilice el dispositivo bajo
el sol. Uso en suelo inquebrantable y estable. No acerque la cara o el
cabello a las hélices mientras el dispositivo está funcionando.
DESCRIPCIÓN DE LAS PIEZAS
1. Protector delantero 2. Tornillo de bloqueo
3. Aspas del ventilador 4. Protector trasero
5. Tuerca del protector delantero (x1) 6. Soporte telescópico
7. Tornillo de ajuste de pivote 8. Tornillo de ajuste de inclinación
9. Carcasa del motor 10. Control de encendido/apagado/velocidad
11. Control de oscilación 12. Eje del motor
13. Tornillo de aspa del ventilador (x1) 14. Clips de retención del
protector15. Base del soporte 16. Peso 17. Arandela de sujeción
18. Tornillo en forma de L 19. Perilla de ajuste 20. Perno
ANTES DEL PRIMER USO
• Saque el aparato y los accesorios de la caja. Retire las pegatinas, la
lámina protectora o el plástico del dispositivo.
• Conectar el cable de alimentación a la toma. (Nota: asegúrese de que
el voltaje que se indica en el dispositivo coincida con el voltaje local
antes de conectar el dispositivo. Voltaje AC220V-240V 50Hz).
MONTAJE: Fije la columna a la placa base mediante tornillos.
Desenrosque la perilla de ajuste de altura. Instale la tapa de la columna
y levántela a la altura deseada. Luego, atornille la perilla de ajuste de
altura para apretar el poste de extensión. Ensamble el conjunto de la
hélice y la rejilla protectora como se muestra.
Nota: Atornille el impulsor en el eje del motor para sostener el
ventilador, luego reemplace la aspa girándola en sentido antihorario.
USO
1. Use las perillas de control de velocidad para elegir el nivel de
ventilación deseado.
2. Para la oscilación, presione hacia abajo el botón de oscilación, tire de
la perilla de oscilación hacia arriba y el ventilador detendrá la oscilación.
3. Nunca introduzca los dedos, lápices ni ningún otro objeto a través del
protector cuando el ventilador esté funcionando.
4. Asegúrese de que el ventilador esté colocado sobre una supercie
nivelada y estable para evitar que se caiga.
5. Desconecte el ventilador antes de moverlo.
LIMPIEZA Y MANTENIMIENTO
1. Desenchufe el aparato antes de empezar a limpiar y antes del
mantenimiento.
2. Use un paño suave y húmedo para limpiar la carcasa, use un poco de
agua jabonosa para eliminar el polvo persistente. No utilice gasolina,
diluyentes u otros disolventes.
3. Antes de guardar el ventilador, límpielo bien, cúbralo con una bolsa
de vinilo y guárdelo en un lugar seco.
Este producto contiene materiales reciclables que cumplen con las pautas WEEE.
No deseche este producto como residuo sin clasicar. Póngase en contacto con su
municipio local para obtener un punto de recogida de reciclaje.

Bu ürün hakkındaki sohbete katıl
Burada Kiwi KFAN-7426 Fan hakkında ne düşündüğünüzü paylaşabilirsiniz. Bir sorunuz varsa öncelikle kılavuzu dikkatlice okuyun. Kılavuz talebinde bulunmak için iletişim formumuzu kullanabilirsiniz.