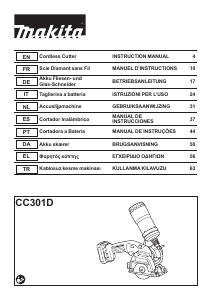
Kullanım kılavuzu Makita CC301D Yuvarlak testere

Makita CC301D Yuvarlak testere’ınız için bir kılavuza mı ihtiyacınız var? Aşağıda PDF kılavuzunu Türkçe olarak ücretsiz olarak görüntüleyebilir ve indirebilirsiniz. Bu ürün şu anda 3 sık sorulan soru, 0 yorum ve 0 oy var. İstediğiniz kılavuz bu değilse lütfen bizimle iletişime geçin.

Ürününüz kusurlu ve kullanma kılavuzu size bir çözüm sunamıyor mu? O zaman ücretsiz tamir hizmetleri için Repair Café’yi ziyaret edin.

Kullanım kılavuzu

Loading…

8 ENGLISH
ASSEMBLY
CAUTION: Always be sure that the tool is
switched off and the battery cartridge is removed
before carrying out any work on the tool.
Installing or removing diamond
wheel
CAUTION: Use only the Makita wrench to
install or remove the diamond wheel.
CAUTION: When installing the diamond
wheel, be sure to tighten the bolt securely.
CAUTION: Always install the diamond wheel
so that the arrow on the diamond wheel points in
the same direction as the arrow on the diamond
wheel case. Otherwise the wheel rotates in reverse,
itmaycausepersonalinjury.
►Fig.7: 1. Shaft lock 2. Hex wrench 3. Tighten
4. Loosen
►Fig.8: 1. Hex bolt 2.Outerange3. Diamond wheel
4.Innerange5. Arrow
To remove the diamond wheel, press the shaft lock fully
so that the diamond wheel cannot revolve and use the
hex wrench to loosen the hex bolt counterclockwise. Then
removethehexbolt,outerangeanddiamondwheel.
To install the diamond wheel, follow the removal pro-
cedure in reverse. Make sure the diamond wheel is
installed so that the arrow on the wheel points in the
same direction as the arrow on the diamond wheel
case.
BE SURE TO TIGHTEN THE HEX BOLT SECURELY.
►Fig.9: 1. Hex bolt 2.Outerange3. Diamond wheel
4.Innerange5. Protrusion (bigger side)
NOTE:Ifaninnerangeisremovedbychance,
installtheinnerangesothatitsprotrusion(bigger
side)facesinsideasshowninthegure.
Hex wrench storage
►Fig.10: 1. Hex wrench
When not in use, store the hex wrench as shown in the
guretokeepitfrombeinglost.
Installing water supply
Loosen the screw A.
Slide the tank holder all the way over the motor housing
so that the notch of the band (part of the tank holder)
ispositionedjustbelowthescrewheadofthetoolas
illustrated.
Then tighten the screw A.
►Fig.11: 1. Screw A 2. Tank holder 3. Motor housing
4. Notch of the band (part of the tank holder)
5. Screw head of the tool
Attach the tank on the tank holder so that the tank
holdertsbetweenthestepanddots.Connectthecap
on the tube end to the mouth of the tank. Turn the tank
clockwise. Then tighten the screw B.
►Fig.12: 1. Tank 2. Tube 3. Screw B
Water supply
CAUTION: When lling the tank with water, be
careful not to let the tool get wet.
Be sure that the water supply cock is closed before
llingthetankwithwater.Openthecaponthetankand
llthewater.Recapthetank.
►Fig.13: 1. Water supply cock 2. Close 3. Open
►Fig.14: 1. Cap 2. Open
OPERATION
CAUTION: This tool should only be used on
horizontal surfaces.
CAUTION: Be sure to hold the workpiece
rmly down on a stable bench or table during
operation.
CAUTION: Do not twist or force the tool in the
cut, or the motor may be overloaded or the work-
piece may break.
CAUTION: Do not use the tool with the dia-
mond wheel in an upward or sideways position.
CAUTION: The wheel for this tool is a wet-
type diamond wheel for glass and tile applica-
tions. Be sure to feed water to the diamond wheel
during operation.
CAUTION: If the cutting action of the diamond
wheel begins to diminish, dress the cutting edge
of the wheel using an old discarded coarse grit
bench grinder wheel or concrete block. Dress by
pressing lightly on the outer edge of the diamond
wheel.
►Fig.15
Holdthetoolrmly.Setthebaseplateontheworkpiece
to be cut without the wheel making any contact.
Then turn the tool on and wait until the wheel attains
full speed.
Feedwatertothewheelbyadjustingthewatersupply
cocktoobtainagentleowofwater.
Move the tool forward over the workpiece surface,
keepingitatandadvancingsmoothlyuntilthecutting
is completed. Keep your cutting line straight and your
speed of advance uniform.
Forne,cleancuts,cutslowly.(Whencuttingglass
plate 5 mm (3/16") thick, cut at about 250 mm/min
(9-7/8"/min). When cutting tile 10 mm (3/8") thick, cut
at about 300 mm/min (11-13/16"/min).) Also slow down
as you complete a cut to avoid breaking or cracking the
workpiece being cut.
NOTE: When the battery cartridge temperature is
low, the tool may not work to its full capacity. At this
time, for example, use the tool for a light-duty cut for
a while until the battery cartridge warms up as high
as room temperature. Then, the tool can work to its
full capacity.
NOTE: Make sure that the water supply cock is
closed before operation.
Türkçe kullanım kılavuzunu indir (PDF, 10.95 MB)
(Çevreyi düşünün ve sadece çok gerekli olması halinde bu kullanma kılavuzunu yazdırın)

Loading…

Derecelendirme

Bir ürün derecelendirmesi yaparak Makita CC301D Yuvarlak testere hakkındaki düşüncelerinizi bize bildirin. Bu ürüne ilişkin deneyimlerinizi paylaşmak veya bir soru sormak ister misiniz? Lütfen sayfanın alt kısmında bir yorum bırakın.
Makita CC301D Yuvarlak testere’den memnun musunuz?
Evet Hayır
Bu ürünü derecelendiren ilk kişi siz olun
0 oylar

Bu ürün hakkındaki sohbete katıl

Burada Makita CC301D Yuvarlak testere hakkında ne düşündüğünüzü paylaşabilirsiniz. Bir sorunuz varsa öncelikle kılavuzu dikkatlice okuyun. Kılavuz talebinde bulunmak için iletişim formumuzu kullanabilirsiniz.

Bu kılavuz hakkında daha fazla bilgi

Makita CC301D Yuvarlak testere cihazınız için basılı bir kılavuza sahip olmanın güzel bir şey olduğunun farkındayız. Kılavuzu her zaman web sitemizden indirebilir ve kendiniz yazdırabilirsiniz. Orijinal bir kılavuza sahip olmak istiyorsanız Makita ile iletişime geçmenizi öneririz. Orijinal bir kılavuz sağlayabilirler. Makita CC301D Yuvarlak testere cihazınızın kılavuzunu farklı bir dilde mi arıyorsunuz? Ana sayfamızdan tercih ettiğiniz dili seçin ve mevcut olup olmadığını görmek için model numarasını arayın.

Özellikler

Marka Makita
Modeli CC301D
Kategori Yuvarlak testereler
Dosya tipi PDF
Dosya boyutu 10.95 MB

Makita Yuvarlak testereler için tüm kılavuzlar
Yuvarlak testereler ile ilgili daha fazla kılavuz

Makita CC301D Yuvarlak testere hakkında Sıkça Sorulan Sorular

Destek ekibimiz faydalı ürün bilgileri arar ve sıkça sorulan soruları cevaplar. Sıkça sorulan sorularda hatalı bir cevaba rastlamanız halinde lütfen bunu iletişim formunu kullanarak bize bildirin.

Testerenin, gördüğüm malzemenin altında kaç milimetre çıkıntı yapması gerekir? Doğrulanmış

Bunu 3 mm veya daha fazla tutmak en iyisidir. Daha az olduğunda, malzemenin parçalanma veya çirkin bir sonuca yol açma şansı vardır.

Bu faydalıydı (95) Devamını oku

Daire testere kullanırken işitme koruması takmam gerekir mi? Doğrulanmış

Evet yapmalısın. Daire testerenin ürettiği gürültü miktarı marka ve modele göre değişiklik gösterse de, yüksek sese uzun süre maruz kalmak kalıcı işitme hasarına neden olabilir. Bu nedenle işitme koruması takmak iyi bir fikirdir.

Bu faydalıydı (43) Devamını oku

Elektrikli aletleri bir kulübede veya garajda saklayabilir miyim? Doğrulanmış

Genel olarak, elektrikli aletleri bazen orada donsa bile bir kulübede veya garajda saklayabilirsiniz. Ancak elektrikli aletin kullanım ömrü açısından büyük sıcaklık dalgalanmalarının olmadığı kuru bir yerde saklanması daha iyidir. Bir kulübede veya garajda sıcaklık farklılıkları yoğuşmanın oluşmasına neden olabilir ve bu da paslanmaya neden olabilir. Ayrıca pille çalışan aletler daha kısa ömürlü olur ve çok düşük sıcaklıklarda da şarj olmaz. Elektrikli aletinizin nasıl saklanması gerektiğinden emin olmak için her zaman kullanım kılavuzunu baştan sona okuyun.

Bu faydalıydı (13) Devamını oku
Kullanım kılavuzu Makita CC301D Yuvarlak testere

İlgili ürünler

İlgili kategoriler