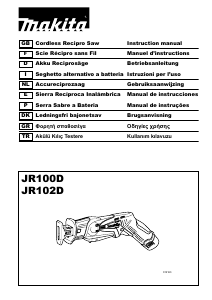
Kullanım kılavuzu Makita JR102D Tilki kuyruğu testere

Makita JR102D Tilki kuyruğu testere’ınız için bir kılavuza mı ihtiyacınız var? Aşağıda PDF kılavuzunu Türkçe olarak ücretsiz olarak görüntüleyebilir ve indirebilirsiniz. Bu ürün şu anda 3 sık sorulan soru, 0 yorum ve 0 oy var. İstediğiniz kılavuz bu değilse lütfen bizimle iletişime geçin.

Ürününüz kusurlu ve kullanma kılavuzu size bir çözüm sunamıyor mu? O zaman ücretsiz tamir hizmetleri için Repair Café’yi ziyaret edin.

Kullanım kılavuzu

Loading…

6
IMPORTANT SAFETY
INSTRUCTIONS
ENC007-7
FOR BATTERY CARTRIDGE
1. Before using battery cartridge, read all
instructions and cautionary markings on (1)
battery charger, (2) battery, and (3) product using
battery.
2. Do not disassemble battery cartridge.
3. If operating time has become excessively shorter,
stop operating immediately. It may result in a risk
of overheating, possible burns and even an
explosion.
4. If electrolyte gets into your eyes, rinse them out
with clear water and seek medical attention right
away. It may result in loss of your eyesight.
5. Do not short the battery cartridge:
(1) Do not touch the terminals with any
conductive material.
(2) Avoid storing battery cartridge in a container
with other metal objects such as nails, coins,
etc.
(3) Do not expose battery cartridge to water or
rain.
A battery short can cause a large current flow,
overheating, possible burns and even a
breakdown.
6. Do not store the tool and battery cartridge in
locations where the temperature may reach or
exceed 50°C (122°F).
7. Do not incinerate the battery cartridge even if it is
severely damaged or is completely worn out. The
battery cartridge can explode in a fire.
8. Be careful not to drop or strike battery.
9. Do not use a damaged battery.
SAVE THESE INSTRUCTIONS.
Tips for maintaining maximum battery life
1. Charge the battery cartridge before completely
discharged.
Always stop tool operation and charge the battery
cartridge when you notice less tool power.
2. Never recharge a fully charged battery cartridge.
Overcharging shortens the battery service life.
3. Charge the battery cartridge with room
temperature at 10°C - 40°C (50°F - 104°F). Let a hot
battery cartridge cool down before charging it.
4. Charge the battery cartridge once in every six
months if you do not use it for a long period of
time.
FUNCTIONAL DESCRIPTION
CAUTION:
Always be sure that the tool is switched off and the
battery cartridge is removed before adjusting or
checking function on the tool.
Installing or removing battery cartridge
(Fig. 1)
Always switch off the tool before installing or removing
of the battery cartridge.
To remove the battery cartridge, withdraw it from the
tool while pressing the buttons on both sides of the
cartridge.
To install the battery cartridge, hold it so that the
battery cartridge front shape fits to that of the battery
installment opening and slip it into place. Always insert
it all the way until it locks in place with a little click. If
not, it may accidentally fall out of the tool, causing
injury to you or someone around you.
Do not use force when installing the battery cartridge. If
the cartridge does not slide in easily, it is not being
inserted correctly.
Battery protection system
The tool is equipped with a battery protection system. This
system automatically cuts off power to the motor to extend
battery life.
The tool will automatically stop during operation if the tool
and/or battery are placed under one of the following
conditions:
Overloaded:
The tool is operated in a manner that causes it to
draw an abnormally high current. In this situation,
release the trigger switch on the tool and stop the
application that caused the tool to become
overloaded. Then pull the trigger switch again to
restart.
Low battery voltage:
The remaining battery capacity is too low and the tool
will not operate. If you pull the switch trigger, the
motor runs again but stops soon. In this situation,
remove and recharge the battery.
Switch action (Fig. 2)
CAUTION:
Before installing the battery cartridge into the tool,
always check to see that the switch lever/trigger
actuates properly and returns to the “OFF” position
when released.
To prevent the switch lever/trigger from accidentally
pulled, the lock-off lever/button are provided.
To start the tool, pull either switch lever or trigger.
For the switch lever, pull the lock-off lever and then pull
the switch lever to start the tool.
For the switch trigger, depress the lock-off button and
then pull the switch trigger to start to the tool. The lock-
off button can be pressed from either right or left.
The tool speed is increased by increasing pressure on the
switch lever/trigger. Release the switch lever/trigger to
stop.
NOTICE:
Do not pull the switch lever/trigger hard without pulling the
lock-off lever/button. This can cause switch breakage.
Lighting up the front lamp (Fig. 3)
CAUTION:
Do not look in the light or see the source of light
directly.
Türkçe kullanım kılavuzunu indir (PDF, 1.23 MB)
(Çevreyi düşünün ve sadece çok gerekli olması halinde bu kullanma kılavuzunu yazdırın)

Loading…

Derecelendirme

Bir ürün derecelendirmesi yaparak Makita JR102D Tilki kuyruğu testere hakkındaki düşüncelerinizi bize bildirin. Bu ürüne ilişkin deneyimlerinizi paylaşmak veya bir soru sormak ister misiniz? Lütfen sayfanın alt kısmında bir yorum bırakın.
Makita JR102D Tilki kuyruğu testere’den memnun musunuz?
Evet Hayır
Bu ürünü derecelendiren ilk kişi siz olun
0 oylar

Bu ürün hakkındaki sohbete katıl

Burada Makita JR102D Tilki kuyruğu testere hakkında ne düşündüğünüzü paylaşabilirsiniz. Bir sorunuz varsa öncelikle kılavuzu dikkatlice okuyun. Kılavuz talebinde bulunmak için iletişim formumuzu kullanabilirsiniz.

Bu kılavuz hakkında daha fazla bilgi

Makita JR102D Tilki kuyruğu testere cihazınız için basılı bir kılavuza sahip olmanın güzel bir şey olduğunun farkındayız. Kılavuzu her zaman web sitemizden indirebilir ve kendiniz yazdırabilirsiniz. Orijinal bir kılavuza sahip olmak istiyorsanız Makita ile iletişime geçmenizi öneririz. Orijinal bir kılavuz sağlayabilirler. Makita JR102D Tilki kuyruğu testere cihazınızın kılavuzunu farklı bir dilde mi arıyorsunuz? Ana sayfamızdan tercih ettiğiniz dili seçin ve mevcut olup olmadığını görmek için model numarasını arayın.

Özellikler

Marka Makita
Modeli JR102D
Kategori Tilki kuyruğu testereler
Dosya tipi PDF
Dosya boyutu 1.23 MB

Makita Tilki kuyruğu testereler için tüm kılavuzlar
Tilki kuyruğu testereler ile ilgili daha fazla kılavuz

Makita JR102D Tilki kuyruğu testere hakkında Sıkça Sorulan Sorular

Destek ekibimiz faydalı ürün bilgileri arar ve sıkça sorulan soruları cevaplar. Sıkça sorulan sorularda hatalı bir cevaba rastlamanız halinde lütfen bunu iletişim formunu kullanarak bize bildirin.

Panter testereyi ne için kullanabilirim? Doğrulanmış

Değiştirilebilir testere bıçağı sayesinde bu testereler neredeyse tüm malzemeler için uygundur. Genellikle kurulum ve temizlik için kullanılırlar.

Bu faydalıydı (42) Devamını oku

Pistonlu testere kullanırken göz koruması kullanmam gerekir mi? Doğrulanmış

Evet. Küçük parçacıklar kesim sırasında yukarı fırlayabilir. Bunlar göze çarptığında kalıcı göz hasarına neden olabilir. Bu nedenle her zaman göz koruması kullanmak gerekir.

Bu faydalıydı (24) Devamını oku

Elektrikli aletleri bir kulübede veya garajda saklayabilir miyim? Doğrulanmış

Genel olarak, elektrikli aletleri bazen orada donsa bile bir kulübede veya garajda saklayabilirsiniz. Ancak elektrikli aletin kullanım ömrü açısından büyük sıcaklık dalgalanmalarının olmadığı kuru bir yerde saklanması daha iyidir. Bir kulübede veya garajda sıcaklık farklılıkları yoğuşmanın oluşmasına neden olabilir ve bu da paslanmaya neden olabilir. Ayrıca pille çalışan aletler daha kısa ömürlü olur ve çok düşük sıcaklıklarda da şarj olmaz. Elektrikli aletinizin nasıl saklanması gerektiğinden emin olmak için her zaman kullanım kılavuzunu baştan sona okuyun.

Bu faydalıydı (11) Devamını oku
Kullanım kılavuzu Makita JR102D Tilki kuyruğu testere

İlgili ürünler

İlgili kategoriler